Humanitec empowers developers to operate their applications end to end, letting them self-serve environments, deployments, databases or logs through a unified UI and CLI Postman is the preeminent platform for building, collaborating, and testing APIs, and it’s API collection concept is a perfect way to bundle all the endpoints and details you need to spin up an application and environment with Humanitec. This post walks through using the two pre-built Humanitec collections to deploy a fullstack application to Kubernetes.
Deploy an application to a Kubernetes cluster via Humanitec
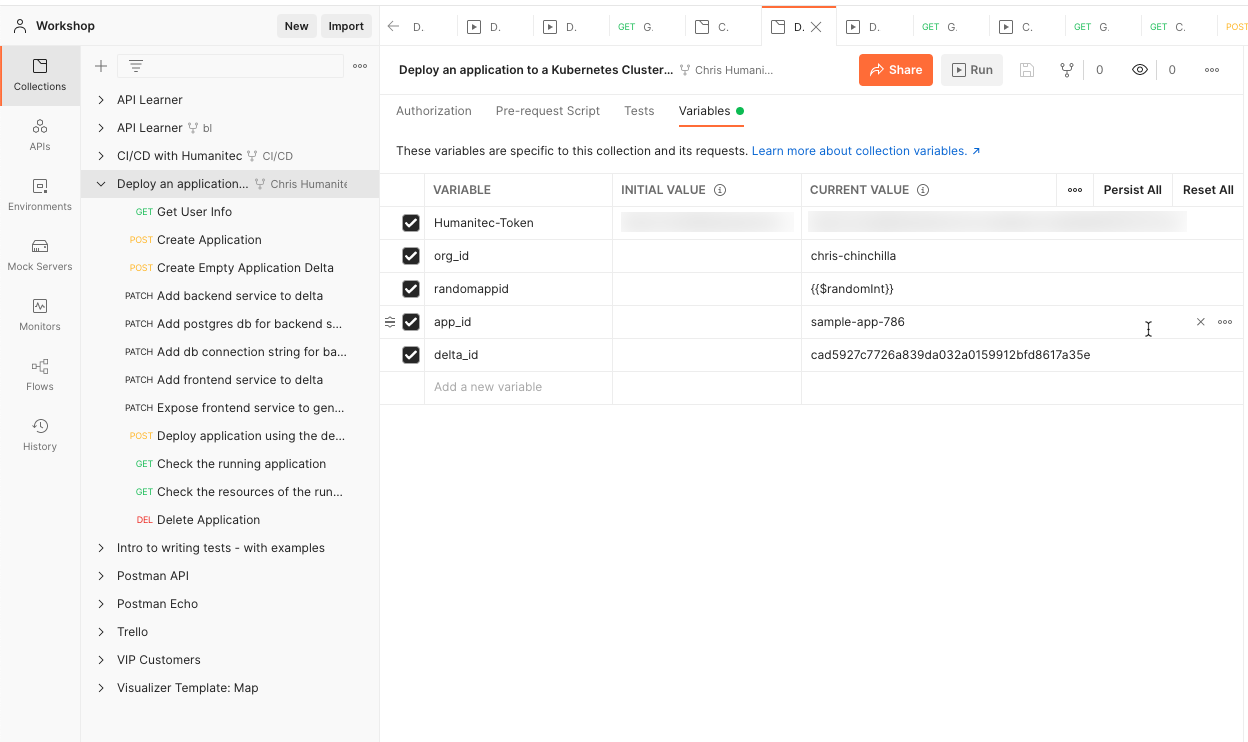
This collection uses the output of previous steps to populate variables needed for later stages. The only variable you need to add is a Humanitec API token. Fork the collection into a workspace of your own, and add it to the initial value of the “Humanitec-Token” variable in the collection.

To summarize each step in the collection.
- Fetch your organization name, as later steps use it to create applications and services as part of the API path.
- Create an application in the organization space, passing an ID and name in the request body.
- Create an empty application delta. Humanitec uses deltas to track changes made to applications between deployments. For each of the subsequent steps up until deploying the application, you send PATCH requests to the delta, creating a new change.
- Add the backend service, sending the definition of the service in the request body including ports exposed, resources. and the container image to use in the request body. The application image is based on this code.
- One of the strengths of Humanitec is the ability to spin up (often longer running) external services you need that don’t make sense to manage via containers. In this case, add a PostgresDB service for the backend service to use for data storage. The body of the request contains the details of the service, which is typically just selecting the service. In this case the deployment creates a postgres DB in an already to Humanitec connected Google cloudsql instance.
- Connect the backend service and the database service with a connection string contained in the body of the request. The string is a postgresql:// formatted connection string referencing the external service(s).
- Add the frontend service, sending the definition of the service including ports exposed, resources. and the container image to use in the request body. The application image is based on this code.
- And another typical external service many applications need is an ingress to control inbound traffic. Add this service by sending another patch request to the delta, with details of the ingress module in the request body.
- Deploy the complete application by sending the ID of the delta to the deployment endpoint, and while you wait for it to become ready, you can use the runtime endpoint to check the deployment status.
- To access the application, query the resources created for the application with the resources endpoint, which in this case includes the DNS record generated for the application.
- At this stage you can use the application to run any tests you need, and when they are complete send a DELETE request.
Using Humanitec and Postman in CI and CD
But there’s more! So far this article looked at creating an application from a repository, and deploying it to Humanitec to create a version for testing, with all the resources it needs. Ideally every time there’s an update to code in a repository (to master or a branch, that’s up to you) you want a new application deployment created, ready for testing.
Humanitec has a second Postman collection that takes the application ID, creates a new testing environment for it, deploys to that new environment, setups auto deployment based on a change to a branch, and optionally deploys a set of changes to the staging environment.
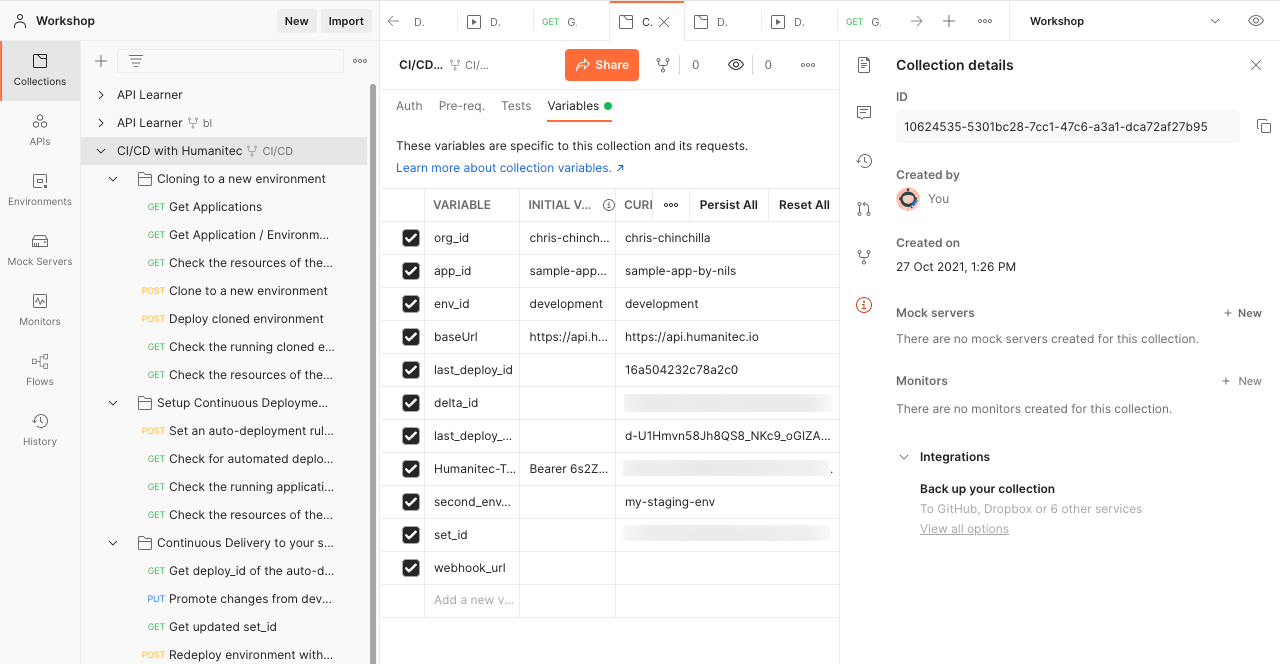
The collection uses the output of previous steps to populate variables needed for later stages. You need to add a Humanitec API token, the app, and org IDs. Fork the collection into a workspace of your own, and add it the initial value of each relevant variable in the collection.

You should be able to run through the collection step-by-step, but test each step individually first to check everything is in place before running the whole collection unsupervised.
Most of the steps build upon concepts seen in the last section, below are some of the more important points and concepts in the process.
The “Cloning to a new environment” folder
You can change the ID and name for the environment in the body for the “Clone to a new environment” step:
<p> CODE:<script src="https://gist.github.com/eskilavelon/dbe2e3b872a3f08224bdb492a49828e3.js"></script>
The step generates a set_id and delta_id in the from_deploy key:
<p> CODE:<script src="https://gist.github.com/eskilavelon/bb4b02921d5fb50b2f3cdc9a8c7ae06c.js"></script>
The “Check the resources of the cloned environment” step returns a wealth of information on the resources generated by a deployment, including the database:
<p> CODE:<script src="https://gist.github.com/eskilavelon/e643723c9e957ef8e62cb18d35b2cb95.js"></script>
And crucially, a DNS record for accessing the application:
<p> CODE:<script src="https://gist.github.com/eskilavelon/f5e8727520b01bf9c53834f5431feef6.js"></script>
The “Setup Continuous Deployment to the development environment” folder
The main step is “Set an auto-deployment rule for the development environment” that defines the rules for when and how to auto-deploy.
<p> CODE:<script src="https://gist.github.com/eskilavelon/6e5fab76c9358baf532482cf50474a83.js"></script>
In this case the Humanitec GitHub action notifies the Humanitec API that a build succeeded and a new container image is ready, then deploying it to the environment.
You can use the GET requests in the same folder to check the status of the deployment, application, and resources.
The “Continuous Delivery to your second environment” folder
The “Get deploy_id of the auto-deployment” step fetches the ID of the last deployment with the intention of then “promoting” it to the staging environment, for example after all tests have completed. Then the “Promote changes from development to the second environment” step takes that ID and issues a PUT request against the staging environment. Note that this endpoint doesn’t return any data, but a “204” status to indicate success.
The “Redeploy environment with promoted changes” takes the updated set ID and then deploys it to the staging environment. You can confirm this deployment in the Humanitec UI, or revisit the generated domain to see the new changes.
Using a CLI to trigger a collection
Manually triggering a Postman collection in a GUI every time you want to spin up an environment isn’t that optimal. Enter Newman, Postman’s tool for interacting with collections via CLI, and CI processes.
The command needed is a simple one, but involves digging to get and set the values needed.
<p> CODE:<script src="https://gist.github.com/eskilavelon/88a4de6e6cffa06965484b41f0c9cc79.js"></script>
You can find the collection ID from the info pane in the Postman UI.
Get an API key from the settings section of your profile page.
Run the command in a terminal window and you see the steps running and resulting output, with a summary of the process when Newman has finished running the collection. For security purposes you should add the Postman API key to CI variables. How you do this depends on the CI you use, but here are instructions for Travis, Jenkins, and GitHub actions.


